How To Set Up A Staging Site With SSL On GridPane
I host my WordPress sites at GridPane. Or rather, to be more accurate, I host them at Digital Ocean but use GridPane as the server manager. GridPane has been an excellent experience since I moved all my sites there in July 2019.
So getting to the question - how to create a WordPress staging site on GridPane with SSL enabled?
Before you can create a staging site you must have a DNS record set-up for staging. You use the same IP address as for the main domain. Here's one I set up on my DNS manager, CloudFlare.

Adding A WordPress Staging Site on GridPane
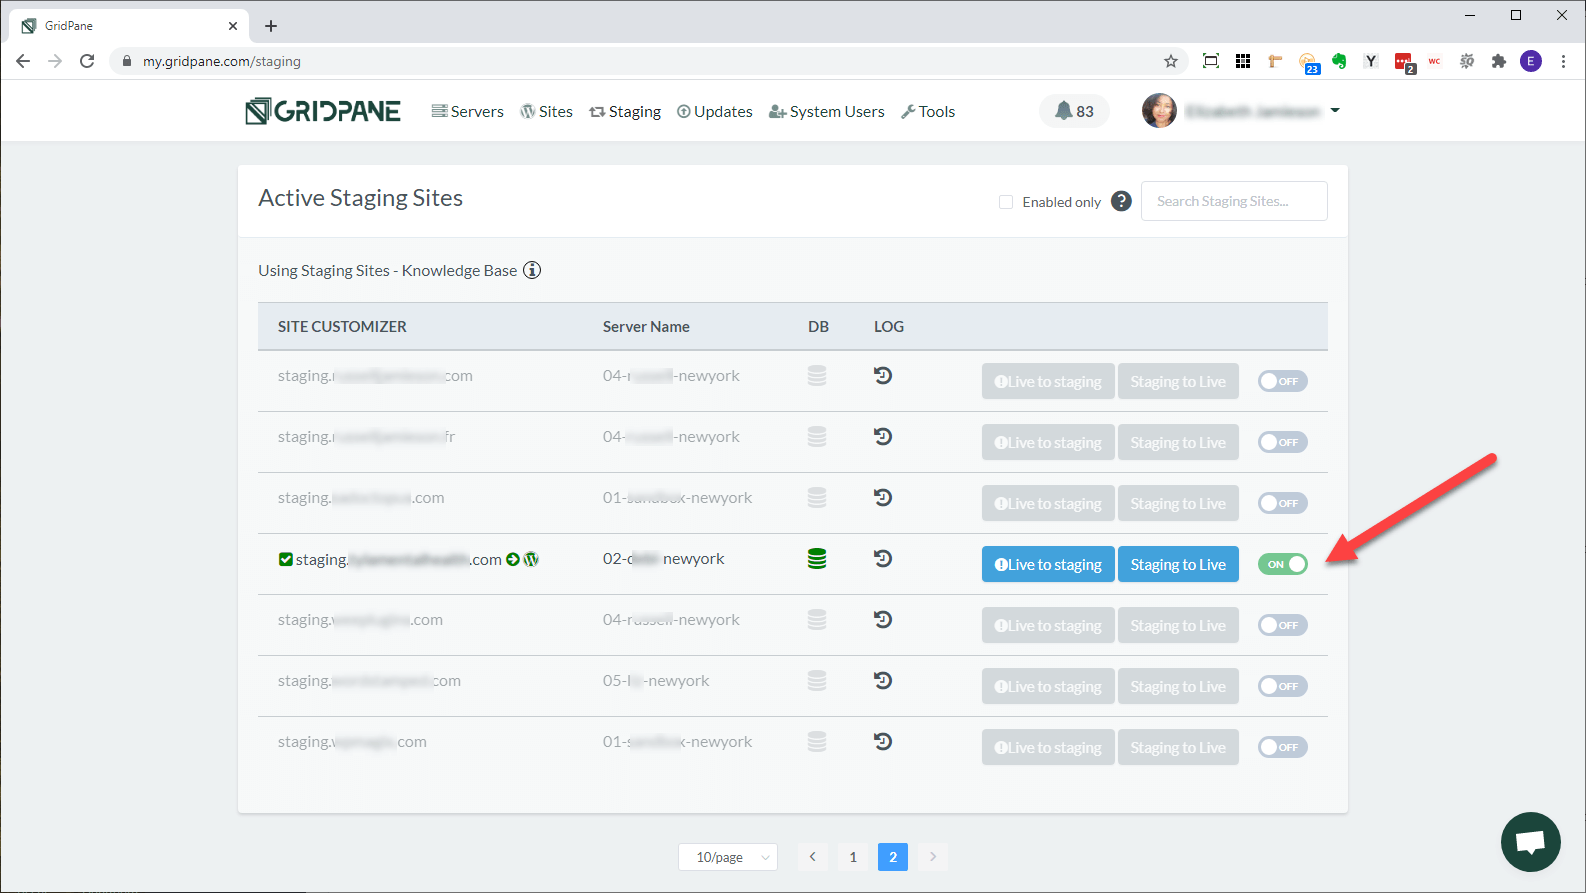
This is the easiest thing to do. You simple click a box to on, and the staging site is created. It is created as a blank WordPress installation running a free default WordPress theme. The installation also automatically includes a plugin to prevent the site being indexed or viewed unless you are logged in.
At this point you can start a new development if this is a brand new site. Alternatively, you can click another button to copy the live site to the staging. You might do this if you want to work on an existing site. If you decide to work on the staging version of the site, when you're finished you can click another button to copy the staging site to the live site. It's easy! I love that it is so easy. See screenshot.

But What About SSL?
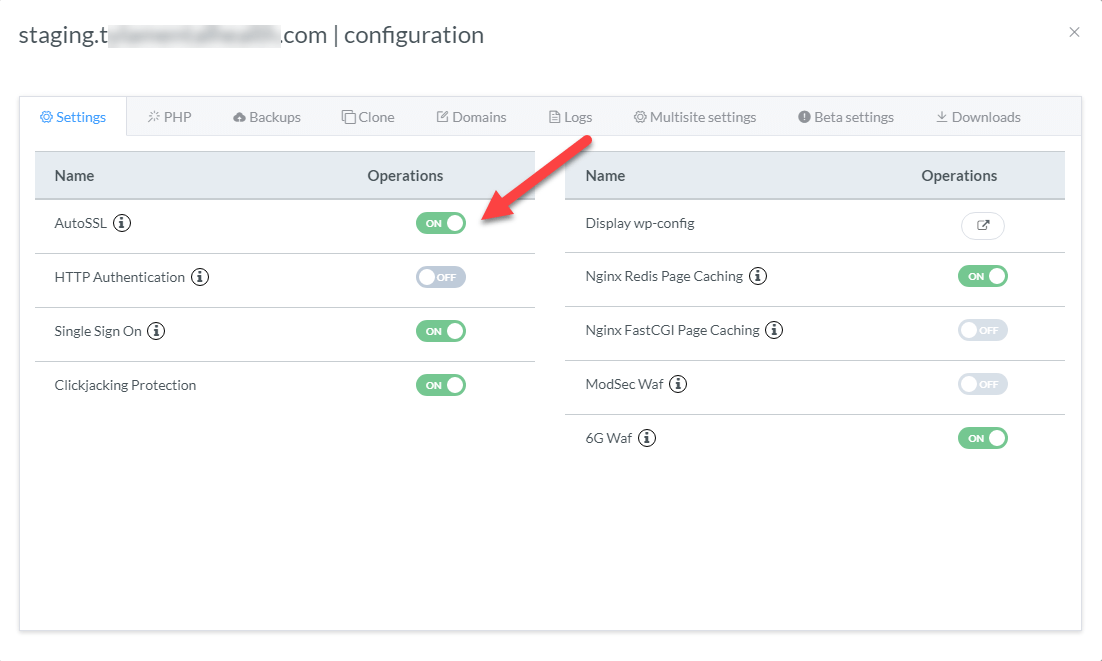
Yes - it can be a pain to not have SSL on a staging site. But with GridPane SSL is also an easy thing to add. Go to the staging site configuration, by clicking on the URL in the above screen, then click the button indicated below to ON, to add SSL to the staging site.

Within a few moments your staging site is running with an SSL certificate, and you can start your development. The experience I've had with GridPane is the best and easiest experience I've had at any host for setting up a WordPress staging site.
